|
Overview What to do with those long pieces? These are also known as keel, chines, sheers and battens. The placement, fitting and clamping of these unwieldy objects can be difficult. In addition, cutting the scarf joints is tedious and needs to be precise. Here is a jig for cutting scarf joints. Fitting these long pieces is difficult due to their length and the fact that very little of their length is straight when they are finally in place. It is strongly recommended that you find at least one helper for the cutting and installation of these pieces. It turns out that due to limited width of my shop area that fitting completed pieces in places is sometimes impossible. This was particularly true for the sheers and side battens. Glue-up of the scarf joints while assembling to the frames for these pieces runs exactly counter to the instructions provided with the plans and other books. I did the in place glue up as there was no other way to handle the pieces and I am quite satisfied with the results. Be careful to place the joints in areas with mild curves. If they are in an area with sharp bend the curve will not be fair. This MAY be correctable in final fairing. |
||
|
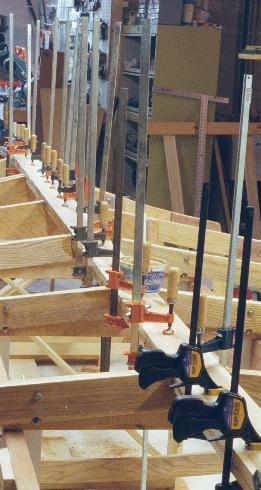
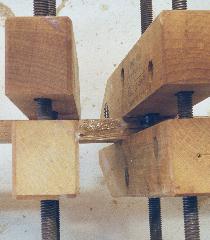
Keel The first long piece to be installed is the keel. This is also the simplest of the "long pieces" to fit into place. It is assembled in place with scarf joints. Start installation at the stem. The initial bend requires quite a bit of pressure. Use several clamps to hold the keel in place as you bend it downwards. The first keel layer should be able to glued in place without requiring any permanent fasteners. Clamp firmly to the frames. This will set the positions of the pieces and then clamp the scarf joint(s). The clamp pressure on the scarf joints will cause them to slide apart if the pieces are not already clamped to the frames. Allow the epoxy to harden. Next apply the second layer of the keel. I found that many (35) clamps were needed to keep the two layers in good contact. |
 |
|
|
Chines In order to fit the complex angles of the chines at the stem, several passes were made in a successive approximation to the final joint. For the final trimming, I found that holding the chine piece clamped loosely against the stem I could the use a saw to trim the end of the chine piece with the saw blade laid against the stem. Again a saw with no set will give the nicest results and not chew into the side of the stem. For the chines I glued up the pieces in to long strips prior to mounting on the frames. The chine curves near the bow extend for quite a distance and even past the first scarf joint. Again start applying the chine at the bow and in the test fitting, clamp it in place over its entire length to the frames. Measure the distances between frames at the chine to make sure that they have remained square. Adjust and re-clamp as necessary. At this point drill the pilot and countersink holes for any screws that may be needed. To apply the glue, remove the front 4 clamps and then apply the glue to the joints and then re-clamp. Next remove the balance of the clamps, apply glue and re-clamp. Doing it in this manner preserved the fit at the stem and allowed glue up to proceed with only one helper. Pre-drilling the pilot holes for the screws makes clean-up of the glue fillets much easier as there is not fresh sawdust in the glue. It also means less glue will be coating the power tools when you are finished. |
||
 |
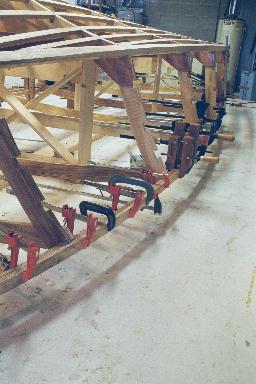
Battens Battens are fitted in the same manner as the chines and the scarf joints are glued up prior to assembly to the frames. I used the boat frame as the work table while gluing the scarf joints. It allows clamping of these long pieces while keeping them straight. After clamping sight down the length of the batten to see that it is straight and fair. Correct as necessary before the glue hardens. Here David is holding the free end of the batten during glue up. |
|
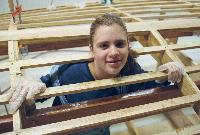
Here is Elyse providing clamping pressure. Only 3 more hours to go... |
||
 |
Notches for battens For cutting of the bottom batten notches see the router jig for battens. The router jig provided consistent notches with minimal hand fitting required other than at the bow. Most of the side frames are too curved to use the router jig. For the sides, now is the time to go back to hand cutting. Make a marking jig and mark each of the notches. For each notch cut 3-5 saw kerfs with a hand saw. The kerfs should be to the depth and angle of the required notch. Take a mortising chisel (3/4" to 1") as shown and chop into the end notches with a strong mallet whack. The pieces between the kerfs will snap off easily. Repeat from the other end of the notch and most pieces will now fall out. Use the chisel to clean up to the depth of the kerfs. If the grain runs parallel to the bottom of the notch, only 3 kerfs are needed. If the grain runs out with respect to the kerfs, use 4, 5 or even 6 kerfs to control the depth and even-ness of the bottom when snapping the waste pieces off. |
|
 |
Sheers Fitting of the sheers to the notches is difficult due to the working position. Most of the cutting and chiseling is done while laying or sitting on the floor. The frames are very springy which makes fore-aft oriented chisel cuts difficult for final fitting. Try to borrow a power chisel (Foredom or AutoMach) from a wood carver. These devices make this RADICALLY EASIER. My dad lent me his AutoMach and initially I was skeptical, but it was a huge help. Much of the chisel work is cross end grain and these devices will pare off beautiful thin curls. Sharpen the blades frequently as the silica filler for the epoxy rapidly wears down the edges. I could not justify buying one of these for this task alone, but it is certainly worth searching out if you can borrow one for a day (offers of beer and a couple of new sharpened chisel tips may help also). |
|
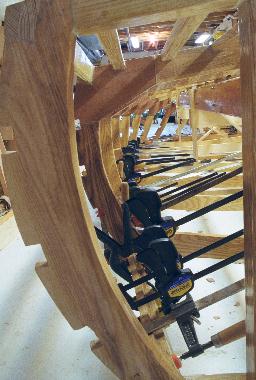 |
View of sheer from looking inwards through the transom.
This is the second layer being held in place. As you can see, once again you cannot have too many clamps. In this case, I borrowed some from a friend. Just be sure to wax the clamps to allow for easy removal of epoxy drips and finger prints. |
|
|
For the sheer, a different assembly method was used than for the battens and chines. This was due to the relatively narrow work space (12 feet), and the long (20-24 foot) sheer pieces were unwieldy. In addition, the thinner members bent much more easily, even though the curves are more extreme. Fit up of the sheers is similar to that of the chines, but at each scarf joint, use 2 clamps. I prefer wooden hand-screw (Jorgensen) clamps for this task due to the large clamping area. Drill a single pilot hole through the center of each scarf joint for a temporary wood screw. The screw will provide for the longitudinal alignment of scarf joint. Check frame alignment again and drill pilot holes for one screw at each frame and for 3 screws at the stem. After drilling the pilot holes at each frame, remove the clamps and pieces and start glue-up at the stem once more. Apply the first piece and then clamp the first scarf joint securely prior to starting to fasten the second piece to the frames. If you fasten the second piece to the frames prior to clamping the scarf joint, it will be impossible to align them properly and the pieces will be angled from each other and provide an abrupt discontinuity in the curves, rather than creating a continuous and fair curve. |
 |
|
| Next: Fairing the frame | ||
| Home | ||