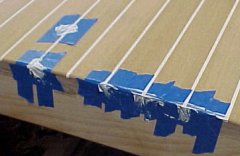
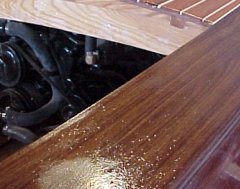
Striping The tops of the mahogany strips and finishing boards are pre-coated with resin to prevent the pigment form getting into the pores of the wood. Be careful when pre-coating, the goal is to NOT pre-coat the inside of grooves. Make one final pass with 40-60 grit sandpaper in the grooves to make sure the edges are clean and straight. Be careful not to round over the edges. The striping is epoxy mixed from resin, slow hardener, West System 601 white pigment and colloidal silica and micro-fibers. Mix the resin, then mix in the pigment (~1tsp for a 6 pump batch). Then add colloidal silica plus micro-fibers until it has the consistency of marshmallow crème. This was the consensus on looks and texture! The micro-fibers are used 1:2 with the silica. The micro-fibers were run through a blender to minimize lumps prior to being added. Use a flat squeegee to force it into the gaps. It took six batches to fill all of the grooves. I also made a final batch that was not as thick and ran it over the top to get a smoother top finish. Let it harden and start sanding.
|
Touch up of striping gaps. Mask off sanded wood and then apply more filler. Remove the tape the next day and sand flush. |
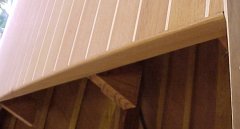
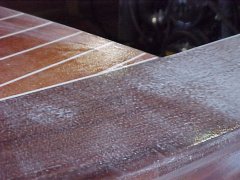
Sanding and trim. The entire surface was sanded with 50 grit belt sander, 60 grit air file and then 80 grit random orbit sander. Sanding took about 8 hours. Removing the excess epoxy is difficult and you must be very careful not to add ripples or gouges. Note: ANY areas that were originally coated and not sanded completely clean to match the surrounding wood will very likely not match the surrounding wood when the final glass / epoxy coat is applied. It will show a different (darker) color due to the amines in the hardener hitting the wood twice and darkening the wood's natural pigments. In addition, the glass wet out may not be as good and the weave will show through to a greater extent. The edges were routed and sanded for an ~ 3/16" radius on the inside. A 1/4" round over was used on the outside along with plane and sanding of the outside corner profile. Do not use a sharper radius, as the glass will not want to conform to a tight curve when wet out. Sharper edges are also more susceptible to damage during normal use of the boat. Pieces of the decking strips were used to finish off the front deck over the dash opening. The bottom edge will be final trimmed later. Due to time pressure I used thick super glue to put on the trim piece.
|
Same area of forward cockpit the next day with the imperfections filled |
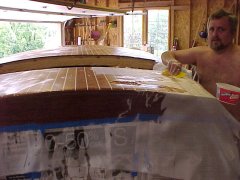
Fiberglass application Of course, the fiberglass is to get applied on what is the hottest day of the year so far. It was 92 degrees outside and hotter in the garage (much warmer than the weather forecast). However, to make an early summer launch, we had to proceed. Such is spring in Wisconsin. Mix small batches and work quickly to squeegee in the resin. If the resin starts to gel, throw it out as it will not completely hide the weave of the cloth. We normally use 4 pump batches for fiber-glassing, and had to cut to 2 pump batches in the heat. The resin quickly heated up and also made the Jen Poly Foam brushes hot and soggy. These are the best I could find for this purpose The hull was taped and draped below the edge and the final trimming of the deck cloth was approximately at the bottom of the finishing board trim. Make all of your fiberglass seams over either a stripe or a joint in the wood. When cutting the joint, the underlying wood is scratched and it looks like another joint. The seams over the stripes are completely invisible. The others do leave a mark in the wood underneath. |
Saturday and Sunday were over 90 degrees F as we did this. On Monday, as I write this page it is back in the 50s. Cool weather fiber-glassing is MUCH easier! |
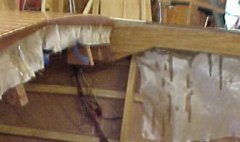
Cockpit draped The cloth was draped over the inside edges and coated in place. When sanding after the second coat, use the random orbit sander to sand off the cloth. This is much easier the trying to trim with a knife or scissors.
|
|
Second coat The second coat is applied as soon as the first starts to set up and looks like this when done. There are still bubbles, dimples, etc. In addition, there are a few mummified insects. Question? Why do the 1-2" wide moths always end up on their backs with both wings glued down? Conversely, mosquitoes just get their feet stuck down.
|
Forward cockpit finishing board |
Sanding the second coat Sand to remove the high spots and sags. do not go for a perfectly even scratch pattern at this point , as you will cut into the fiberglass. Vacuum up the dust and damp wash down with vinegar water and then finally with clear water. |
Forward cockpit edge sanded |
Third and final coats Apply the third coat to the sanded surface. Once it starts to set up, apply the fourth coat. These coats were rolled on and then tipped off with a foam brush. This is the view from the rear |
|
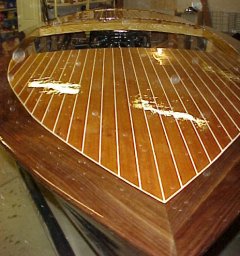
Ready to sand again Here is the boat after the fourth coat of resin. The spots (that look like water spots) are actually in the camera lens due to the specular highlight from the glossy surface. |
|
Varnishing Varnishing is required for UV protection of the epoxy. Without it, the epoxy WILL degrade in the sun eventually yellowing, turning cloudy and failing. To prepare for varnishing the entire hull must be sanded again. This time use 220 grit and go for a full uniform scratch pattern. There should be no unsanded areas. This will level the surface and prep the finish to show off a perfectly fair surface under beautiful high gloss varnish. Any ripples, sags, bumps, dimples, pimples, etc., become painfully obvious under the varnish. For the varnish, I used Z-spar Flagship. This was thinned slightly with T10 thinner to get a good brushing consistency. With a little practice, you can get a coat of varnish on the entire boat in 1.5 hours. It takes 1 quart of varnish per coat for the entire hull (excluding painted portions). As you will see in later photos, the epoxy does add a golden color to the finish, and the white stripes become somewhat cream colored. I used VC varnish for the dash and it was absolutely miserable to work with. It would get bubbles that would not pop and flow out. It also skinned over in the tightly sealed and nearly full can every night!
|
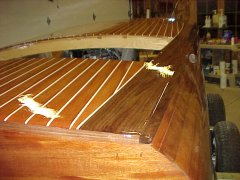
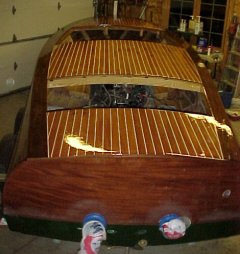
Another shot of the fiber-glassed hull Note the bags to protect the exhaust trumpets. This is still pre-varnish.
|
Next: Engine Hatch |
|