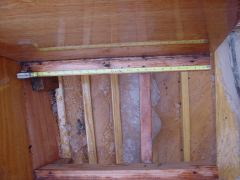
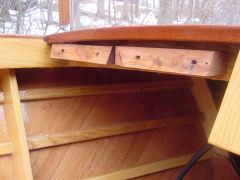
| Driver's seat The driver's seat placement governed the placement of the controls. It is laid out first and then the dash controls are measured for fit. The seat supports rest on the stringer on the inboard side. The outboard ends are supported by blocks fastened to the inside of the chines and to the bottom battens. The outboard support blocks must be able to not only hold the seat up (obvious), but must also hold the seat down to accommodate people stepping on the inward edge of the seat. The inboard seat back support is made of a 2x6 and bolted to the side of the stringer. It is also notched around the rear edge of the lower rear seat support. The seat back support should have a rounded edge rather than sharp / square as shown. This will be changed to for safety reasons. The completed first year drivers seat is shown. The top corner of the back is square and will be rounded over. The outboard edge of the seat back rests against a small block under the cockpit side rail as seen in the photo. This will be replaced with a smaller, curved bracket for aesthetic reasons. The plywood panel holding the throttle control is placed before the seat installation. The driver's seat was probably the least well finished seat, but we wanted to get the boat in the water and I knew it would get reworked for the upholstery. Throttle & Shift controlA Morse MV2 control is used. A 6mm plywood panel is mounted on the inside to provide a finished surface and mounting for the control. The panel is scribed to fit around the framing. A plywood ledge is built out from one of the battens to support the upper edge of the panel. A 1x1" strip is glued on the underside to provide mount for the panel screws to grab. A spacer is also added on the inside of the chine to support the bottom edge of the panel. It took considerable adjustment and several mock ups to get it right. do not forget to allow for shift and throttle linkage motion and to allow for the additional depth of the cable ends! The top edge is recessed (note the mounting screws) to allow holing keys, soda cans, etc. The panel is coated prior to installation and then screwed in place. It is meant to be removable for future access if necessary
|

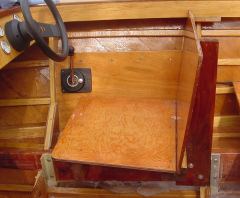
Old driver's seat
New driver's seat bottom and rear bracket |
| Spotter's seat
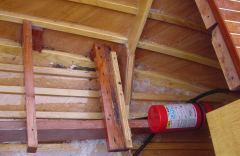
Since the primary use is as a ski boat, rather than have a forward facing front or split forward facing seats, I created a rear facing spotter's seat. This is unconventional for a classic boat, but very comfortable and practical for the front passenger who will be the spotter for the skiers. The bottom seat support construction is very similar to that of the driver's seat. The top of the seat back is supported by wooden blocks that are mounted to the dash carlin. The trim for the forward edge of the cockpit is about 1" tall. The seat back was scribed to fit just below it. The strange shape of the seatback outer edge was dictated by the frame of the boat. I did not want to leave a large gap open. Note the fire extinguisher mounted behind the back of the seat. This proved to be a convenient location. In use, towels and other items we want to keep dry are also stowed behind the spotter's seat and the fire extinguisher helps keep them there. Note also the black cable routed under the fire extinguisher. This is the steering cable. It is concealed and protected by the seat.
|
Back support blocks
Bottom supports
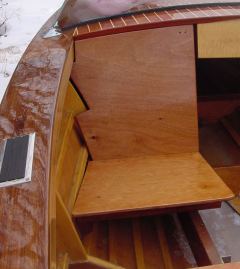
Completed original spotter's seat
|
|
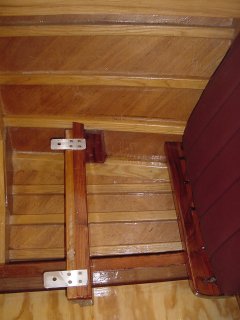
New spotter' s seat brackets
The seat bottom did not fit the same after being upholstered. It was necessary to slot the rear mounting holes and add new bracket clips at the edge of the seat. The clips are mad out of 1/8"x1.5" aluminum stock. The seat is then bolted to them from the bottom. The seat back also has an aluminum angle bracket (hidden) to allow fastening from the rear. In this photo the upholstered back is also visible. |
|
| Next: On the water | |
| Home |